The PDE team has given RCP developers some great new features in Eclipse 3.5. It’s now much easier to create and manage target platforms for Eclipse RCP applications. In this post, I’ll outline one simple workflow that should work in most cases.
But first, if you’re interested in what a target platform is or why you might want to create one, check out these previous posts.
So now that you understand why we should create a target platform, what’s the best way to do it?
Create a target definition file
Eclipse target platforms can be created and selected directly in the Target Platform preferences page, but a better approach is to define your target platform using a target definition file. A target definition file outlines what should be included in your target platform and where the features and bundles can be located. More importantly, target definition files can be checked in to your version control repository and shared among the members of your team.
So how do we create one? You see here a sample RCP application that was generated with the Hello World template. Let’s add a target definition to this project.
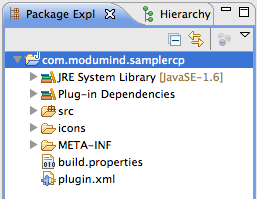
Right-click on the project name and select New > Other. Then choose Plug-in Development > Target Definition in the wizard selection dialog.
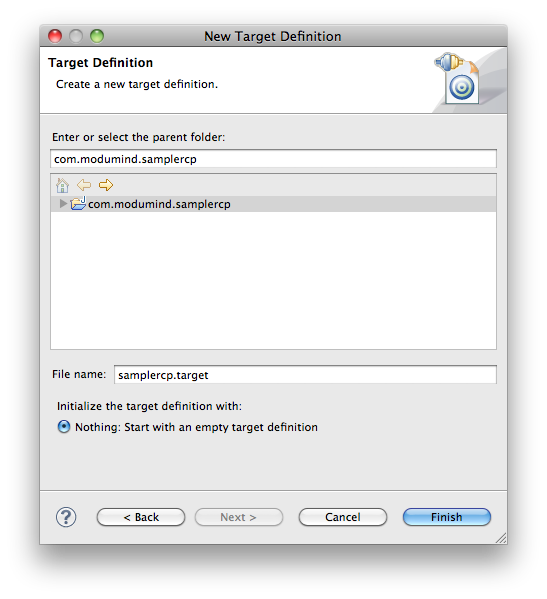
The wizard page prompts you to select a file name, and I’m going to choose samplercp.target to match my project name. Remember, it’s a good idea to have a separate target platform for each project you work on.
Define your target platform
Now that we have a target definition file in our project, we can select what to include in our target platform. We do that by identifying one or more locations that may contain features or bundles. Eclipse 3.5 supports four types of locations (directories, installations, features, and software sites).
In this workflow, I’ll be using a software site which means that the features and bundles will be downloaded from a repository and stored locally under my workspace .metadata folder.
For an RCP application, we typically want to set our target platform to the Eclipse RCP SDK which is made up of two features:
org.eclipse.rcporg.eclipse.rcp.source
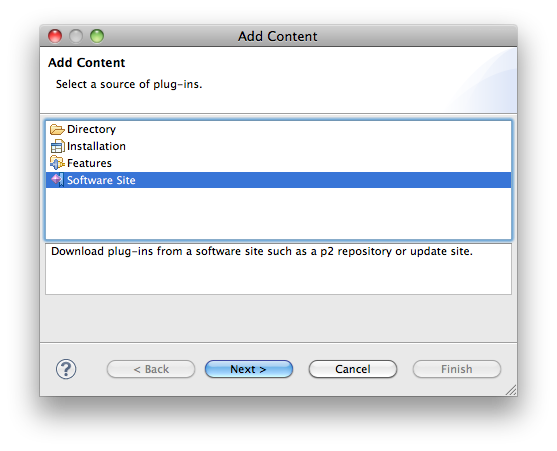
Let’s add these features to our target platform. Start by clicking Add in the Target Definition Editor (this editor should have opened automatically after you created the target definition file). Then select Software Site on the Add Content dialog and click Next.
The next page of the wizard is where the real work is done. We’re going to specify a repository location where the Eclipse RCP SDK can be retrieved.
- First, select the Galileo repository from the Work with drop-down.
- Next, deselect the Group by Category checkbox. For some reason, the Eclipse RCP SDK does not appear anywhere in the category listing. You would think it would be included under the EclipseRT Target Platform Components category, but no such luck.
- Finally, place a check next to the Eclipse RCP SDK entry in the list and click Finish
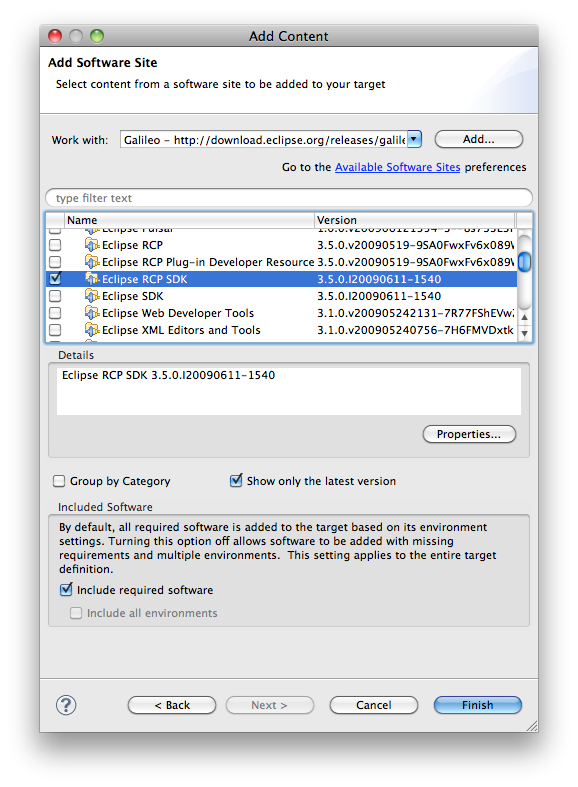
As soon as you click finish, Eclipse PDE will start the process of downloading the RCP SDK to your machine. Your target definition file should look like this:
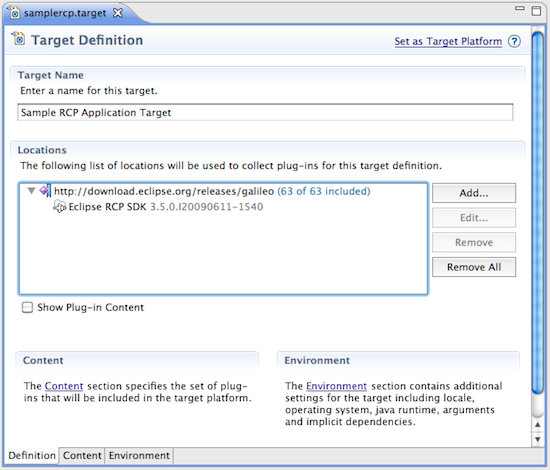
Activate your new target platform
The final step is to activate your target platform by clicking the Set as Target Platform link in the upper-right corner of the Target Definition Editor. Then you’re all set! And make sure to check in your target definition so everyone on your team can share the fruits of your hard work 😉
